.png?height=120&name=ServioTechnologies_logotext%20(1).png)
A "Loan" refers to the actual loan that is granted to the employee. Once the loan is granted, it is recorded in Lemonade, and the loan repayments are tracked until the loan is fully repaid.
📌 Prerequisites
Before creating a Loan record, it is necessary that you create the following documents:
👉🏻 To access Loan, go to:
HR Module > Loan Module> Loan
I. Create Loan Entry for an Employee
⚙ Steps:
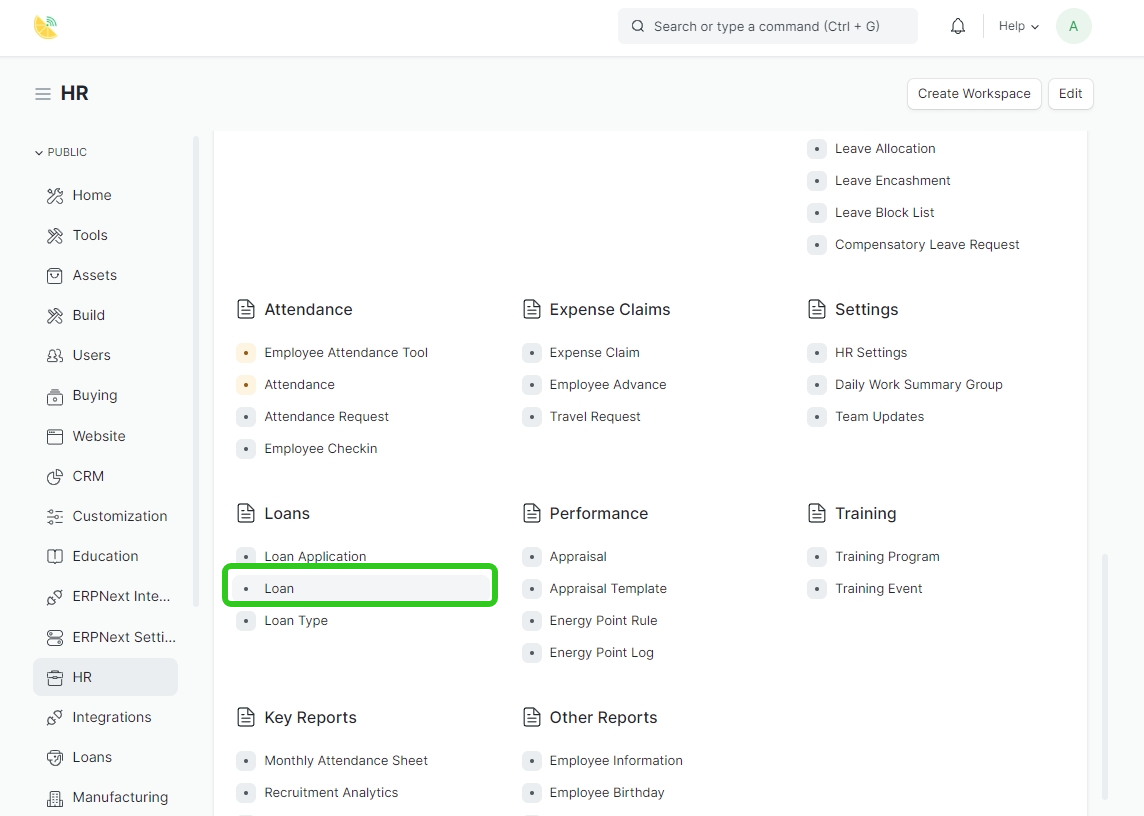
- Navigate to the " HR " module. In the HR Module dashboard, locate the "Loan " section. Look for the Loan.
-
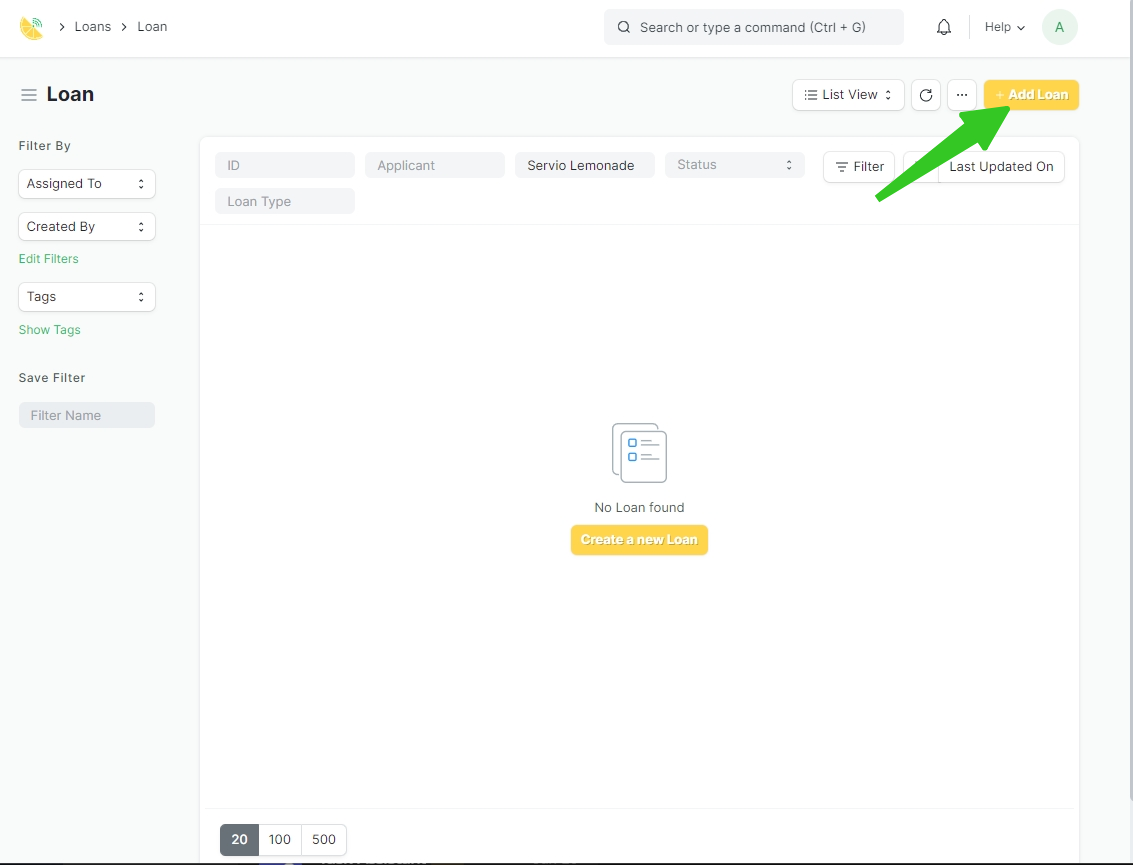
Click on the "Add loan" button to create a new loan.
-
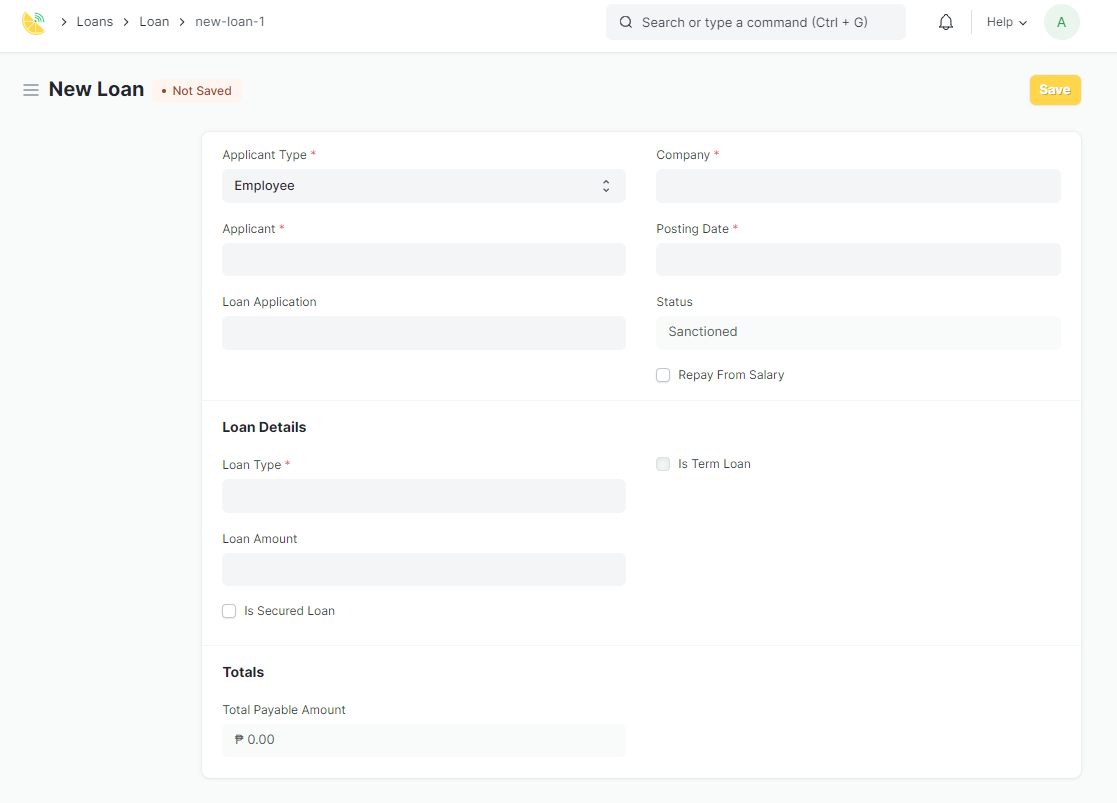
The fields you listed are for creating a new loan in Lemonade. Here's a breakdown of what each field represents:
-
Applicant Type: This field indicates whether the loan applicant is an Employee or an Applicant (someone who is not an employee).
-
Applicant: If the Applicant Type is set to "Employee", this field will allow you to select the name of the employee who is applying for the loan.
-
Loan Application: If a loan application has already been created for the loan, you can select it here. Otherwise, you can leave it blank.
-
Company: This field indicates the company that the loan is associated with.
-
Posting Date: This is the date on which the loan is being posted or recorded in Lemonade.
-
Status: This field indicates the current status of the loan. "Sanctioned" means that the loan has been approved.
-
Repay From Salary: This field indicates whether the loan will be repaid from the employee's salary.
-
Loan Details: This section includes details about the loan, such as the loan type and the loan amount.
-
Loan Type: This field allows you to select the type of loan that is being applied for. If the loan type has not been created yet, you can create a new one by clicking "New".
-
Loan Amount: This field indicates the amount of the loan.
-
Is Secured Loan: If the loan is secured by collateral, you can check this box.
-
Is Term Loan: If the loan is a term loan (i.e. has a fixed repayment term), you can check this box.
-
Totals: This section shows the total payable amount of the loan, including interest and any other charges.
3. Click "Save" to create the loan.
II. Create Loan Entry for In Bulk
-
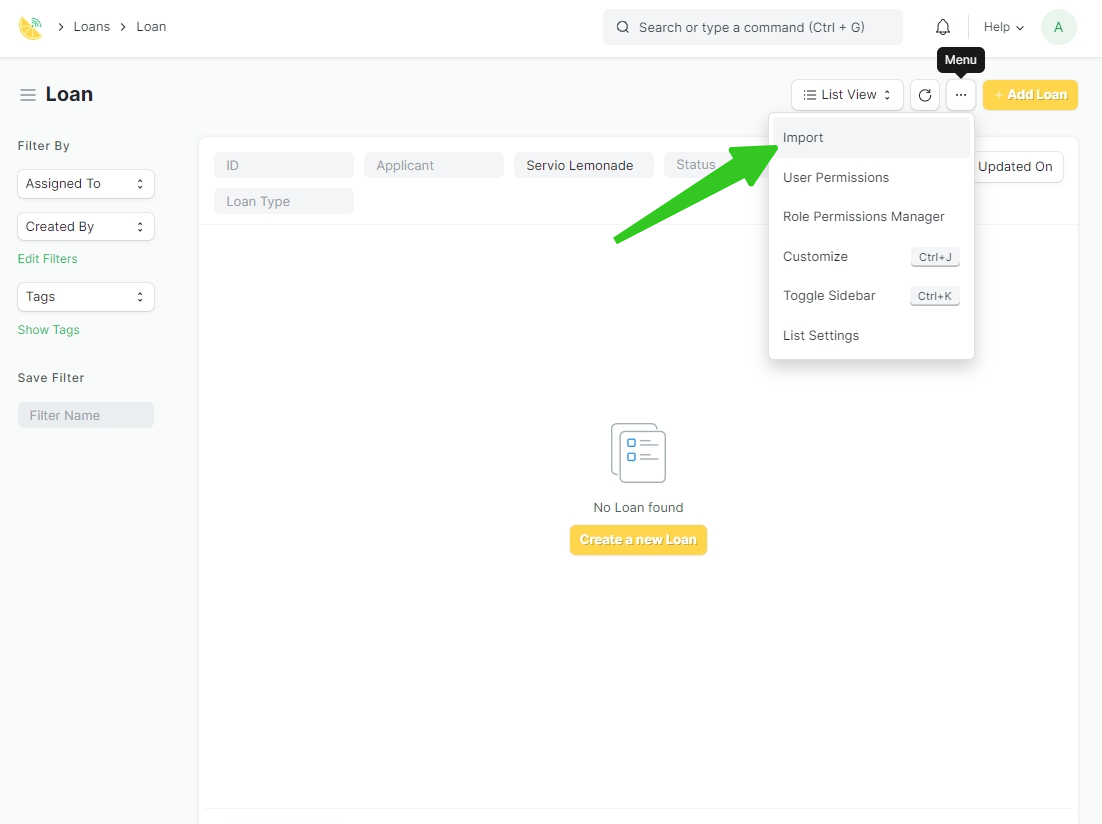
From the "Loan" list view, click on the dots icon(...) and select "Import" in the top right corner of the page
-
From the list view of the "Data Import" view, click on the "Add Data Import" button located in the top right corner of the page.

-
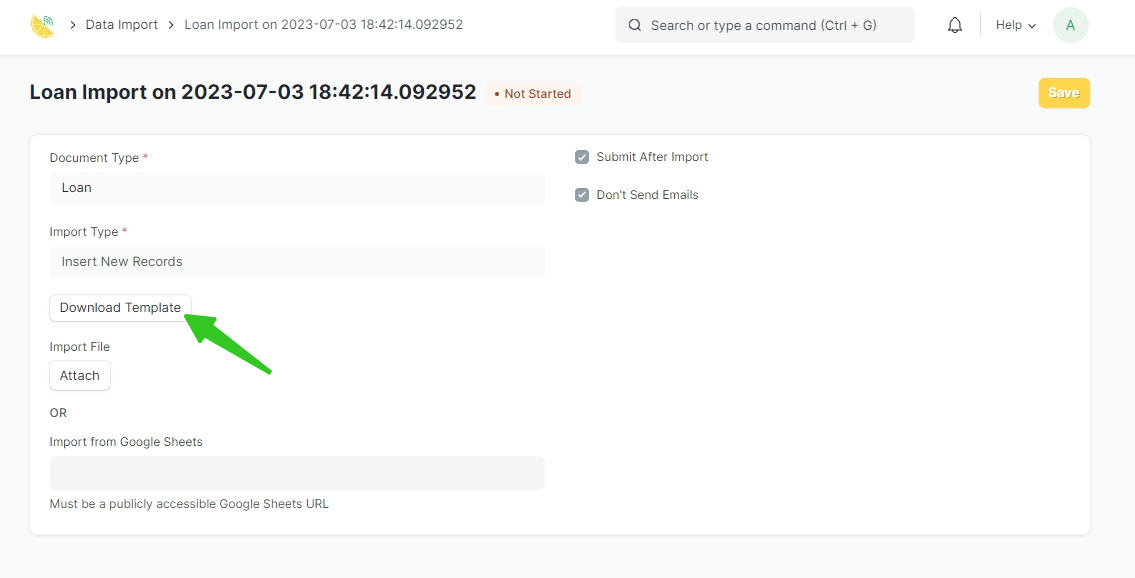
In the New Data Import Pag. Select the appropriate details
- "Document Type" -(Loan)
- "Import Type" -(Insert New Records)
- "Submit after Import" when importing records. Checking this option will automatically submit the records after they are imported.
- "Don't Send Emails"- refrain from sending any email communications when Data is Imported

-
Click on "Download Template" to download the loan import template:
-
Select the desired File type either CSV or Excel
-
The export type, which in this case is "Blank Template" since there are no existing records to be exported.
-
Select fields to insert-select the specific fields to be included in the export, the fields highlighted in red indicate the required information needed for exporting data."such as loan details, applicant information, repayment terms, and payment accounts. Each field has a checkbox next to it, allowing you to choose which fields to include in the export.
-
-
Then click "export " the template will be downloaded to your local file
-
Open the downloaded CSV file using a spreadsheet program like Microsoft Excel or Google Sheets: Locate the downloaded CSV or Excel file on your computer and open it using a spreadsheet program like Microsoft Excel or Google Sheets.
-
Fill in the required fields with the loan details you want to import: The CSV template contains all the fields required to import loan data into Lemonade.
-
Save the filled-in CSV file to your computer: Once you have filled in all the required fields, save the CSV file to your computer.
-
In the "Loan Import" dialog box, click on "Choose File" to select the CSV file you just saved:
-
Once done click Save and Start Import.